Import PDFs and scans
Bring PDFs and images into a sheet, check whether Frisket can read their text, and decide whether each row is a file, a page or a document.
Before you start
Importing PDFs does three things:
- It copies the files into your project.
- It gets the text out of each one, so Frisket can search and read it.
- It puts them in a sheet, with one row per file, per page or per document.
Getting the text is the part that needs your attention, because PDFs come in three kinds:
- Made on a computer, such as a court filing downloaded from an e-filing system. These usually have their text built in.
- Scanned. A scan is a picture of a page. Frisket has to read the text off the image, which is called OCR.
- Built-in text that's wrong: words run together, lines out of order, or nonsense.
The import lets you see which kind you have before anything is added.
Open Import
On the Data tab, the first tab on the ribbon, click Import data… at the left.

Add your files
The Import dialog lists four kinds of import down the left. For PDFs there are two:
- Multiple files when each PDF is one document: one filing, one letter, one report. This is the usual choice. You can mix in images and other files.
- Split PDFs when one PDF holds several documents, such as a scanned bundle of letters or a packet of filings. Frisket helps you find where each document starts, and makes one row for each.
If you're not sure, choose Multiple files. You can still switch to splitting on the next screen.
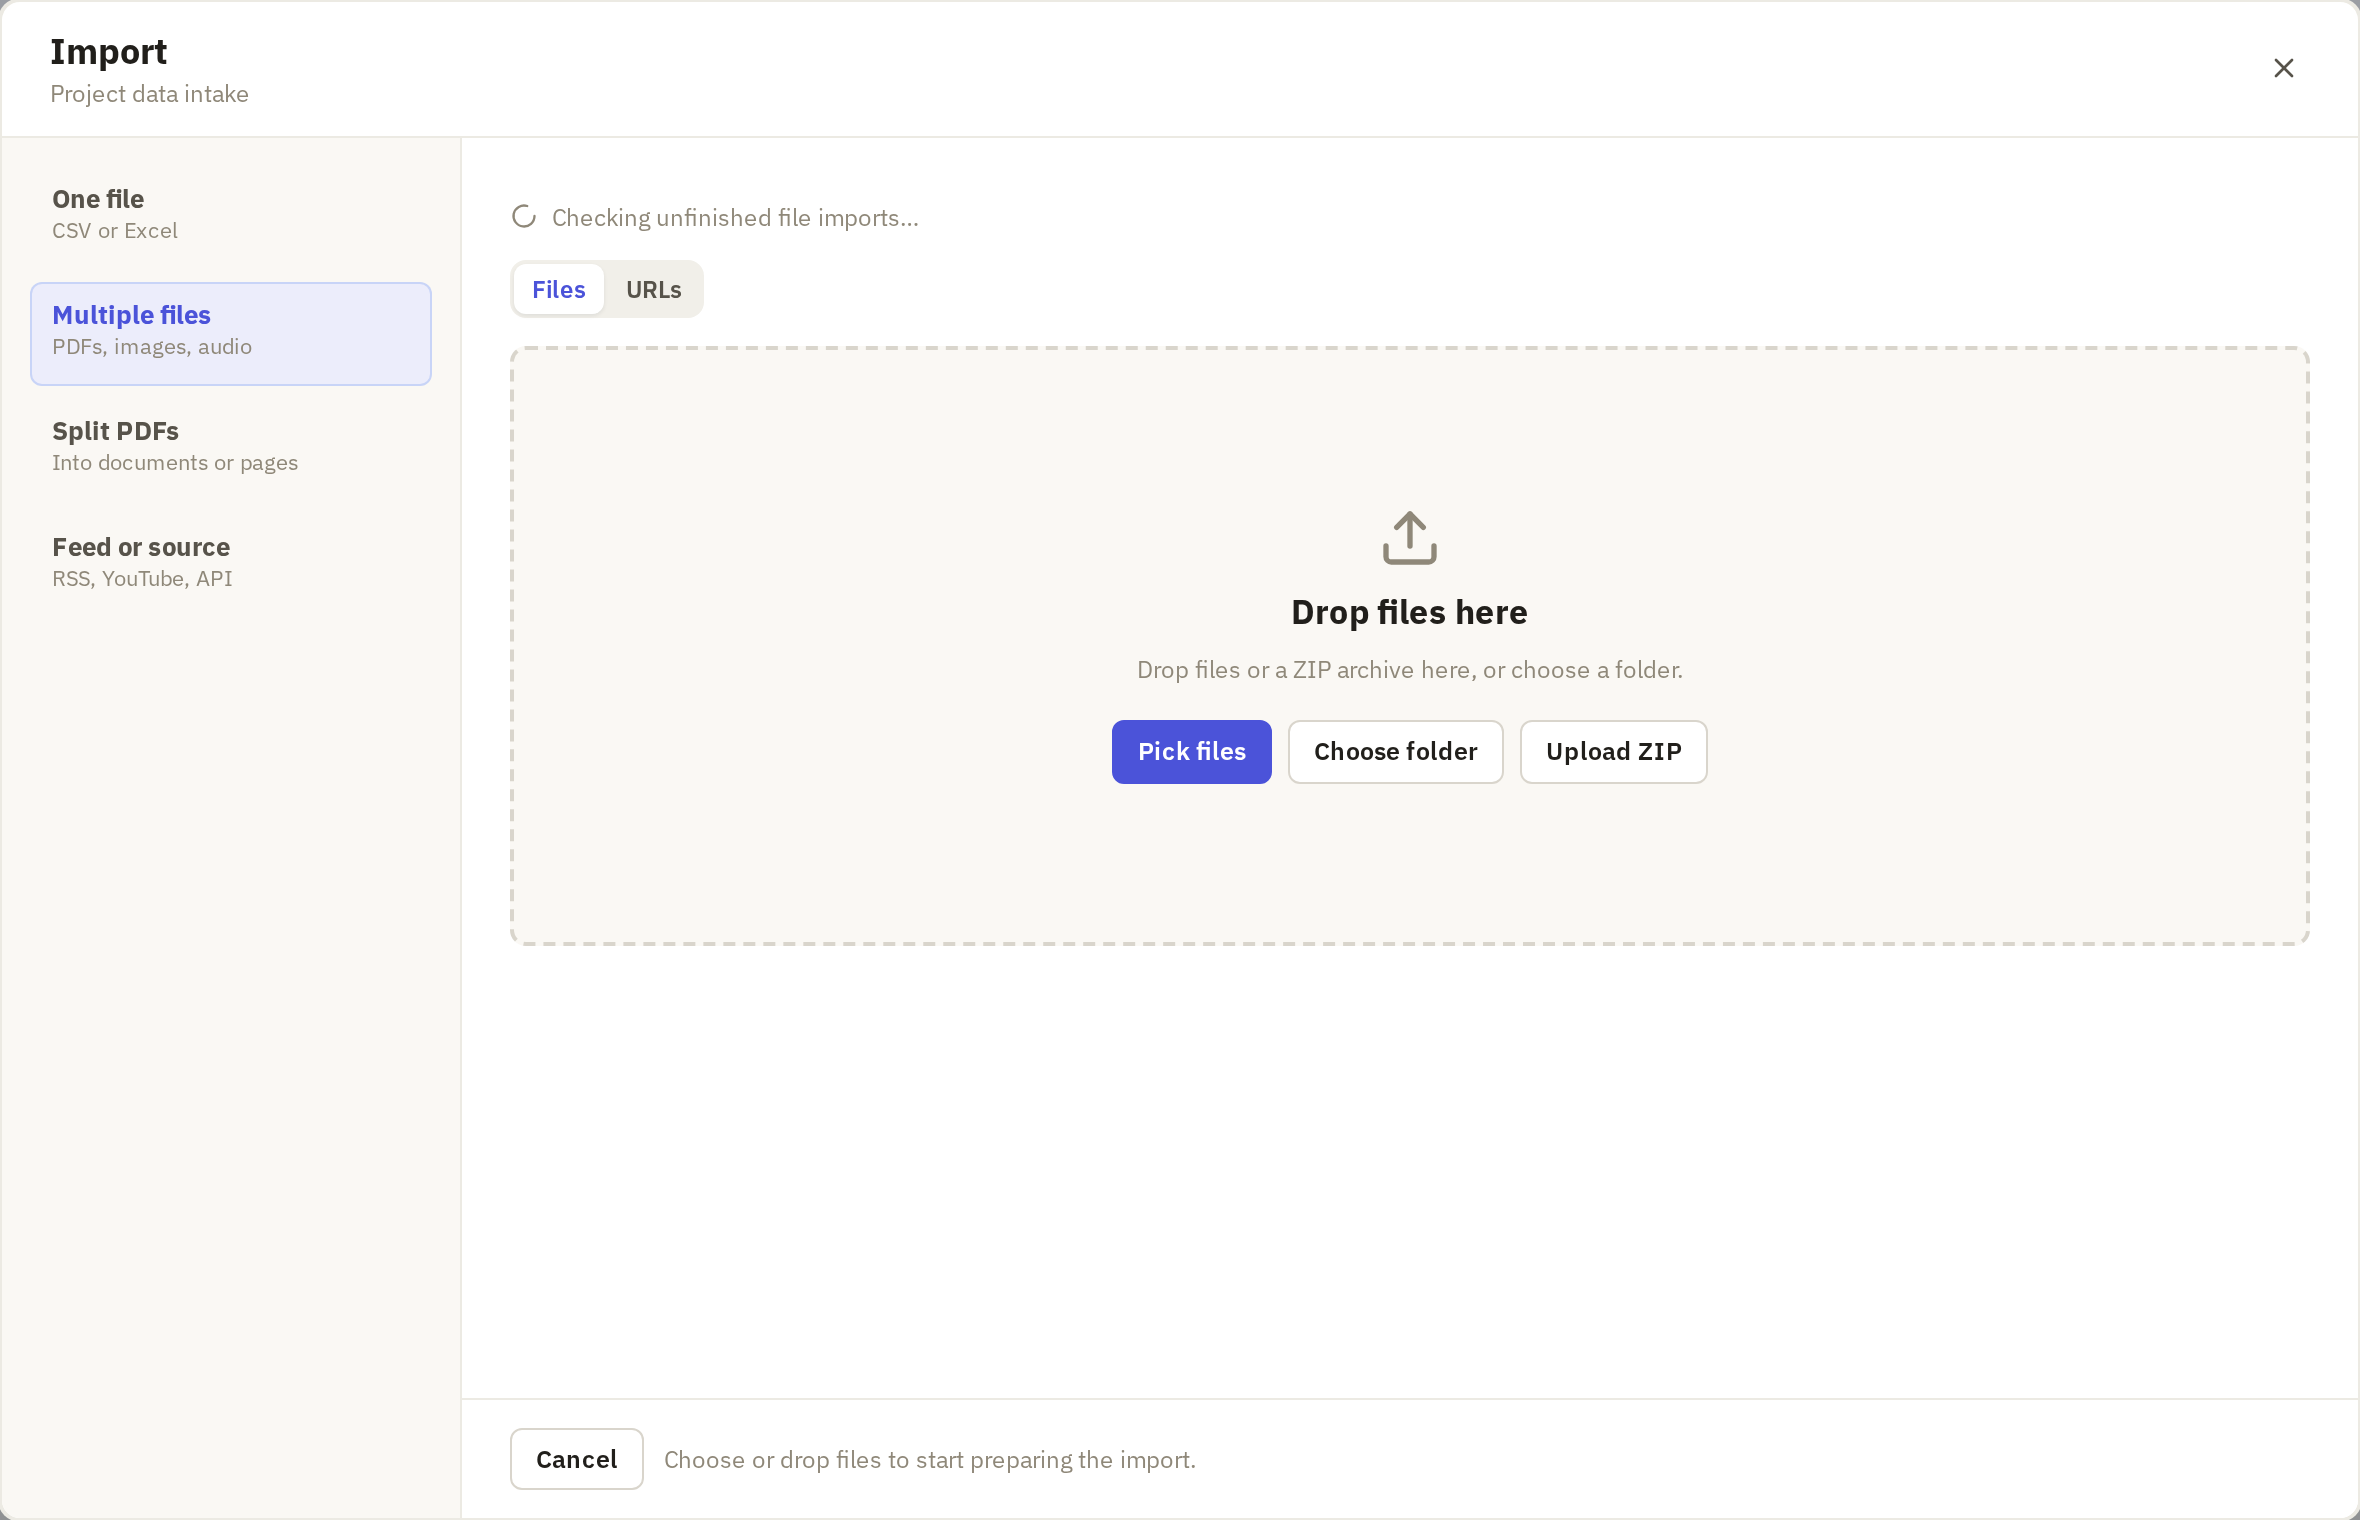
Click Pick files to choose PDFs, Choose folder to bring in a whole folder, or Upload ZIP for a ZIP archive. You can also drag files onto the dialog.
Frisket copies the files to a holding area and starts reading them. Nothing is added to your project yet; you can still cancel. When the files have loaded, click Check text.
Check the text
This screen shows you whether Frisket can read your files.
On the left, Frisket sorts the files into groups:
- PDFs with a text layer have built-in text.
- Text may be garbled have built-in text that looks wrong.
- PDFs with no text layer are scans with no text at all.
Below the groups are a few sample files. Click one to see its first page beside its text.
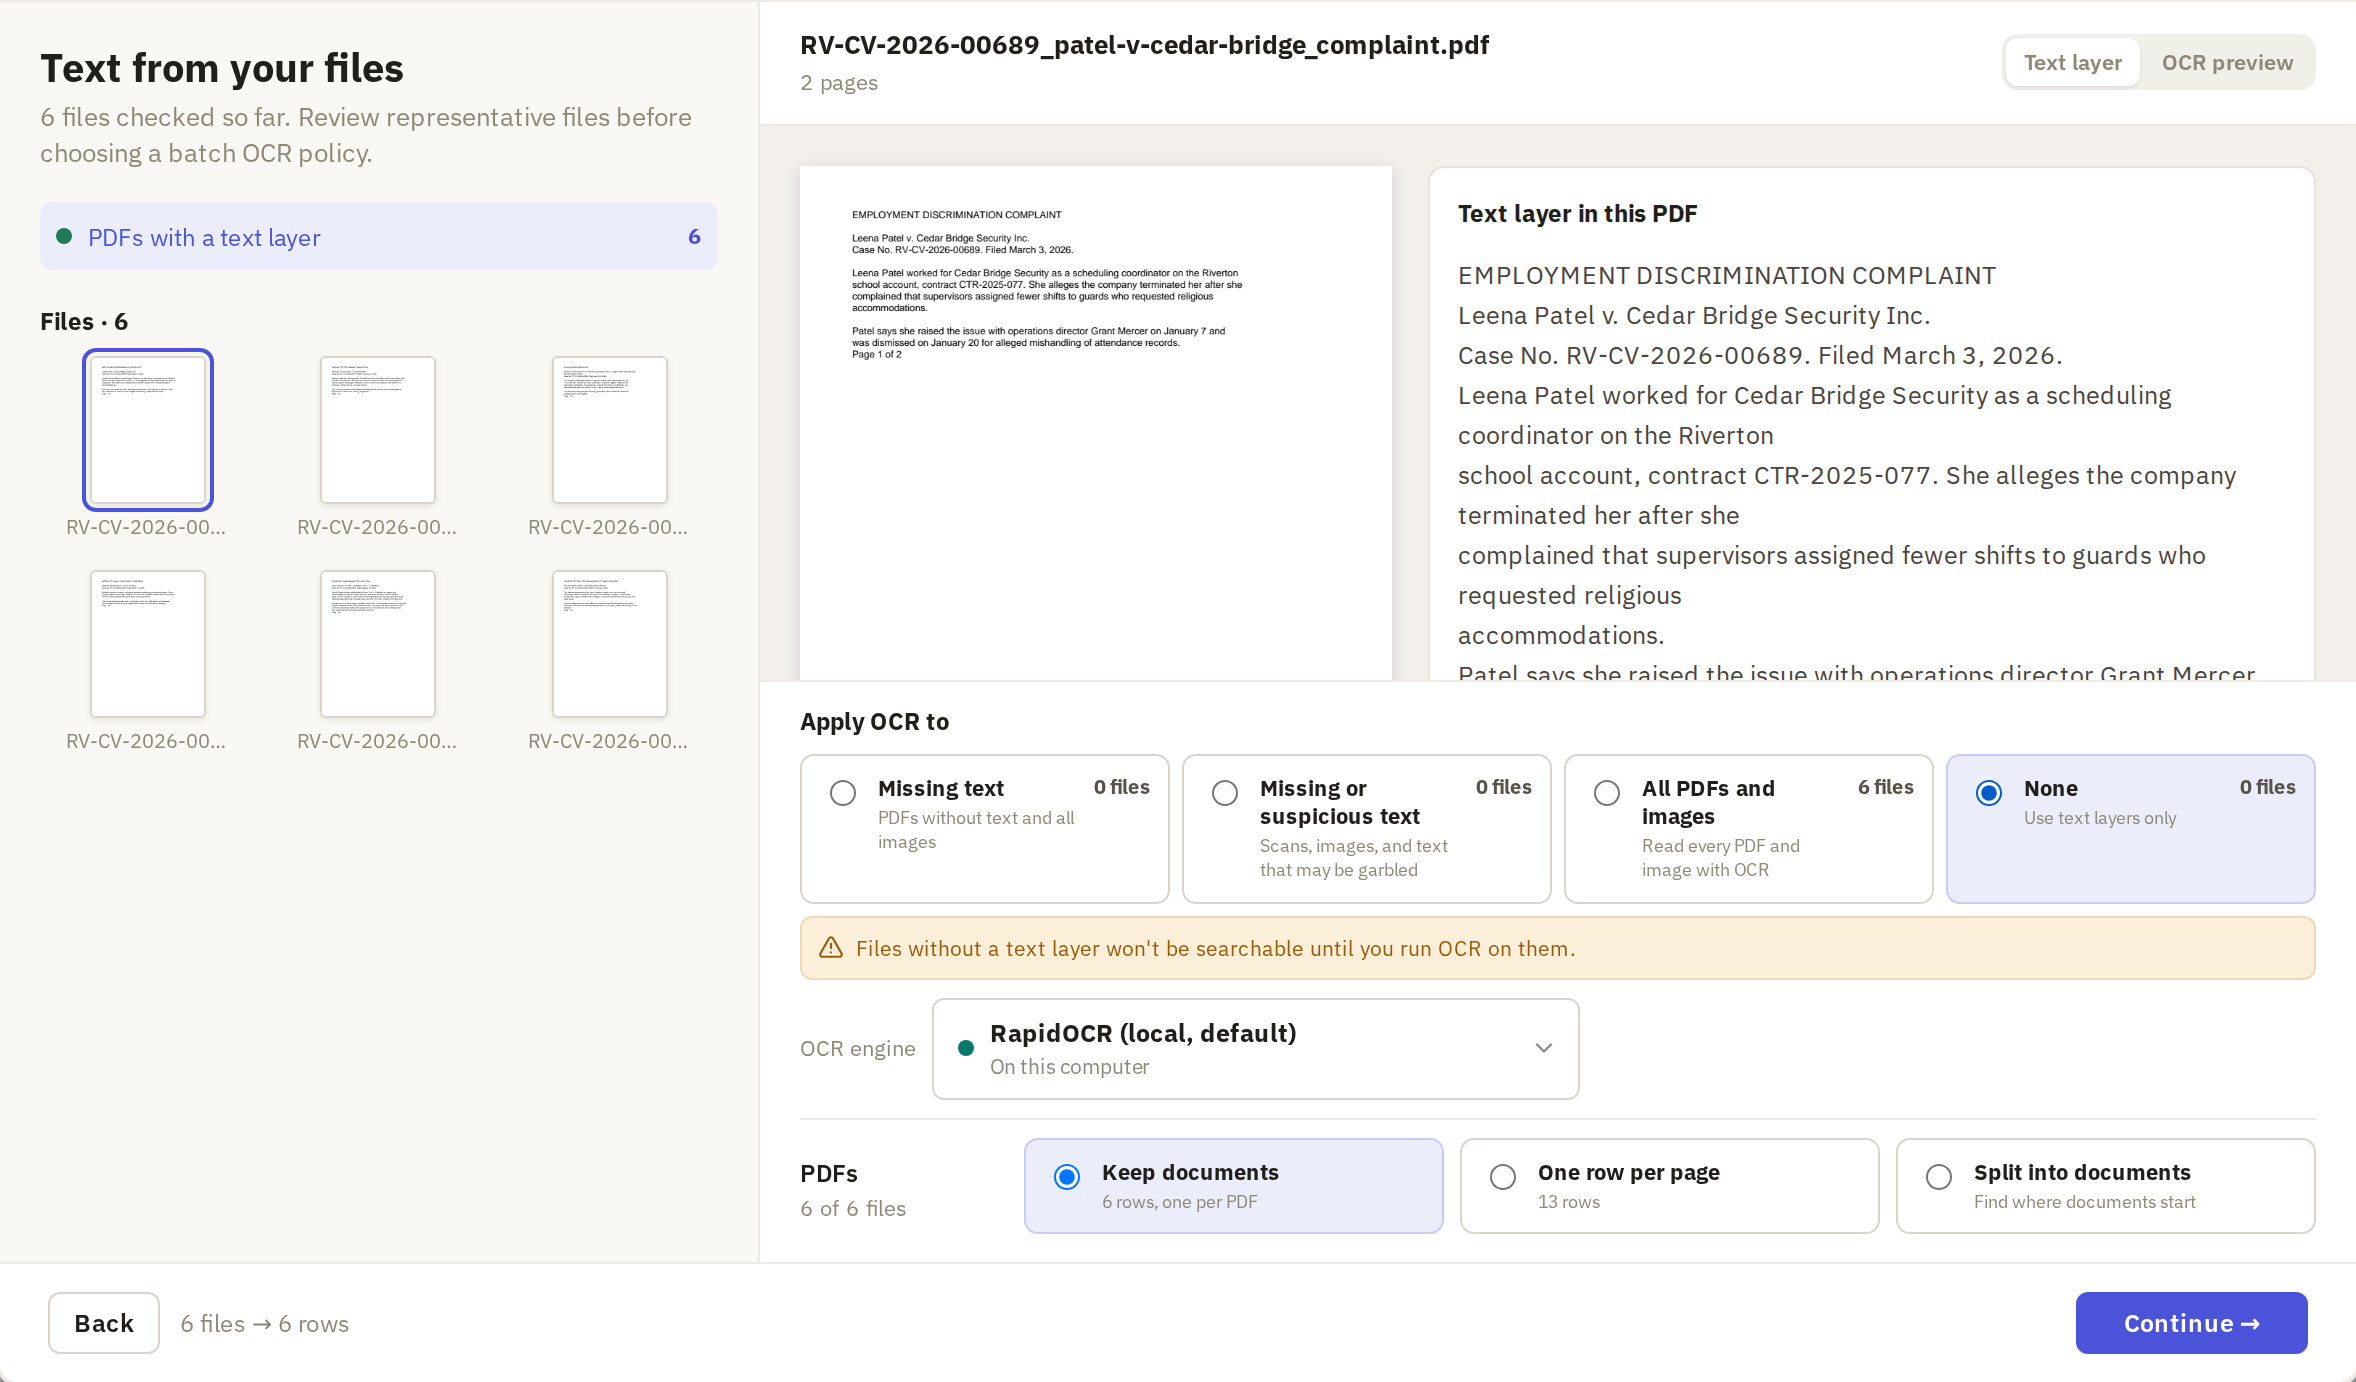
Read the text on the right against the page on the left. You're looking for:
- Nothing on the right. The file is a scan and needs OCR.
- Words run together or split apart, such as "CedarBridge" or "Ce dar Bridge".
- Wrong characters, especially in names and numbers: 0 for O, 1 for l, missing accents.
- Lines out of order, which happens with columns, headers and footers.
If the text matches the page, you can use it as it is. Check one file from each group, and a page with names and numbers on it, before you decide.
Choose which files get OCR
Under Apply OCR to, choose which files Frisket should read again from the page image:
- Missing or suspicious text, the default, reads the scans and anything in the "garbled" group. Choose it when your files are a mix, or you aren't sure.
- Missing text reads only the files with no text at all. Choose it when the built-in text you checked looked right.
- All PDFs and images ignores the built-in text and reads every page. Choose it when the built-in text is wrong in ways Frisket didn't flag.
- None uses the built-in text as it is. Choose it when every file has good text, as in this example.
Each option shows how many files it covers. If you choose None, files that have no text won't be searchable until you run OCR on them later.
OCR engine chooses what reads the pages. The default, RapidOCR, runs wherever Frisket is running: on your computer if you use Frisket Desktop. An orange dot means its model needs a one-time download first; click the engine to set it up. To see what OCR would produce, click OCR preview at the top right and read the text again.
Choose what each row holds
Next to PDFs, choose what one row of the sheet should be. Think about what you'll do next with the rows.
- Keep documents: one row per PDF. Choose this when each PDF is one document and you want one answer per document, such as the case number and parties of each filing. This is the default.
- One row per page: each page becomes its own row, with its own text and its own copy of the page. Choose this when you want to find or extract things page by page, such as which page a payment appears on.
- Split into documents: choose this when a PDF holds several documents. Frisket adds a step to find where each one starts.
The footer shows how many rows you'll get, for example 6 files → 6 rows. Click Continue.
Choose a sheet
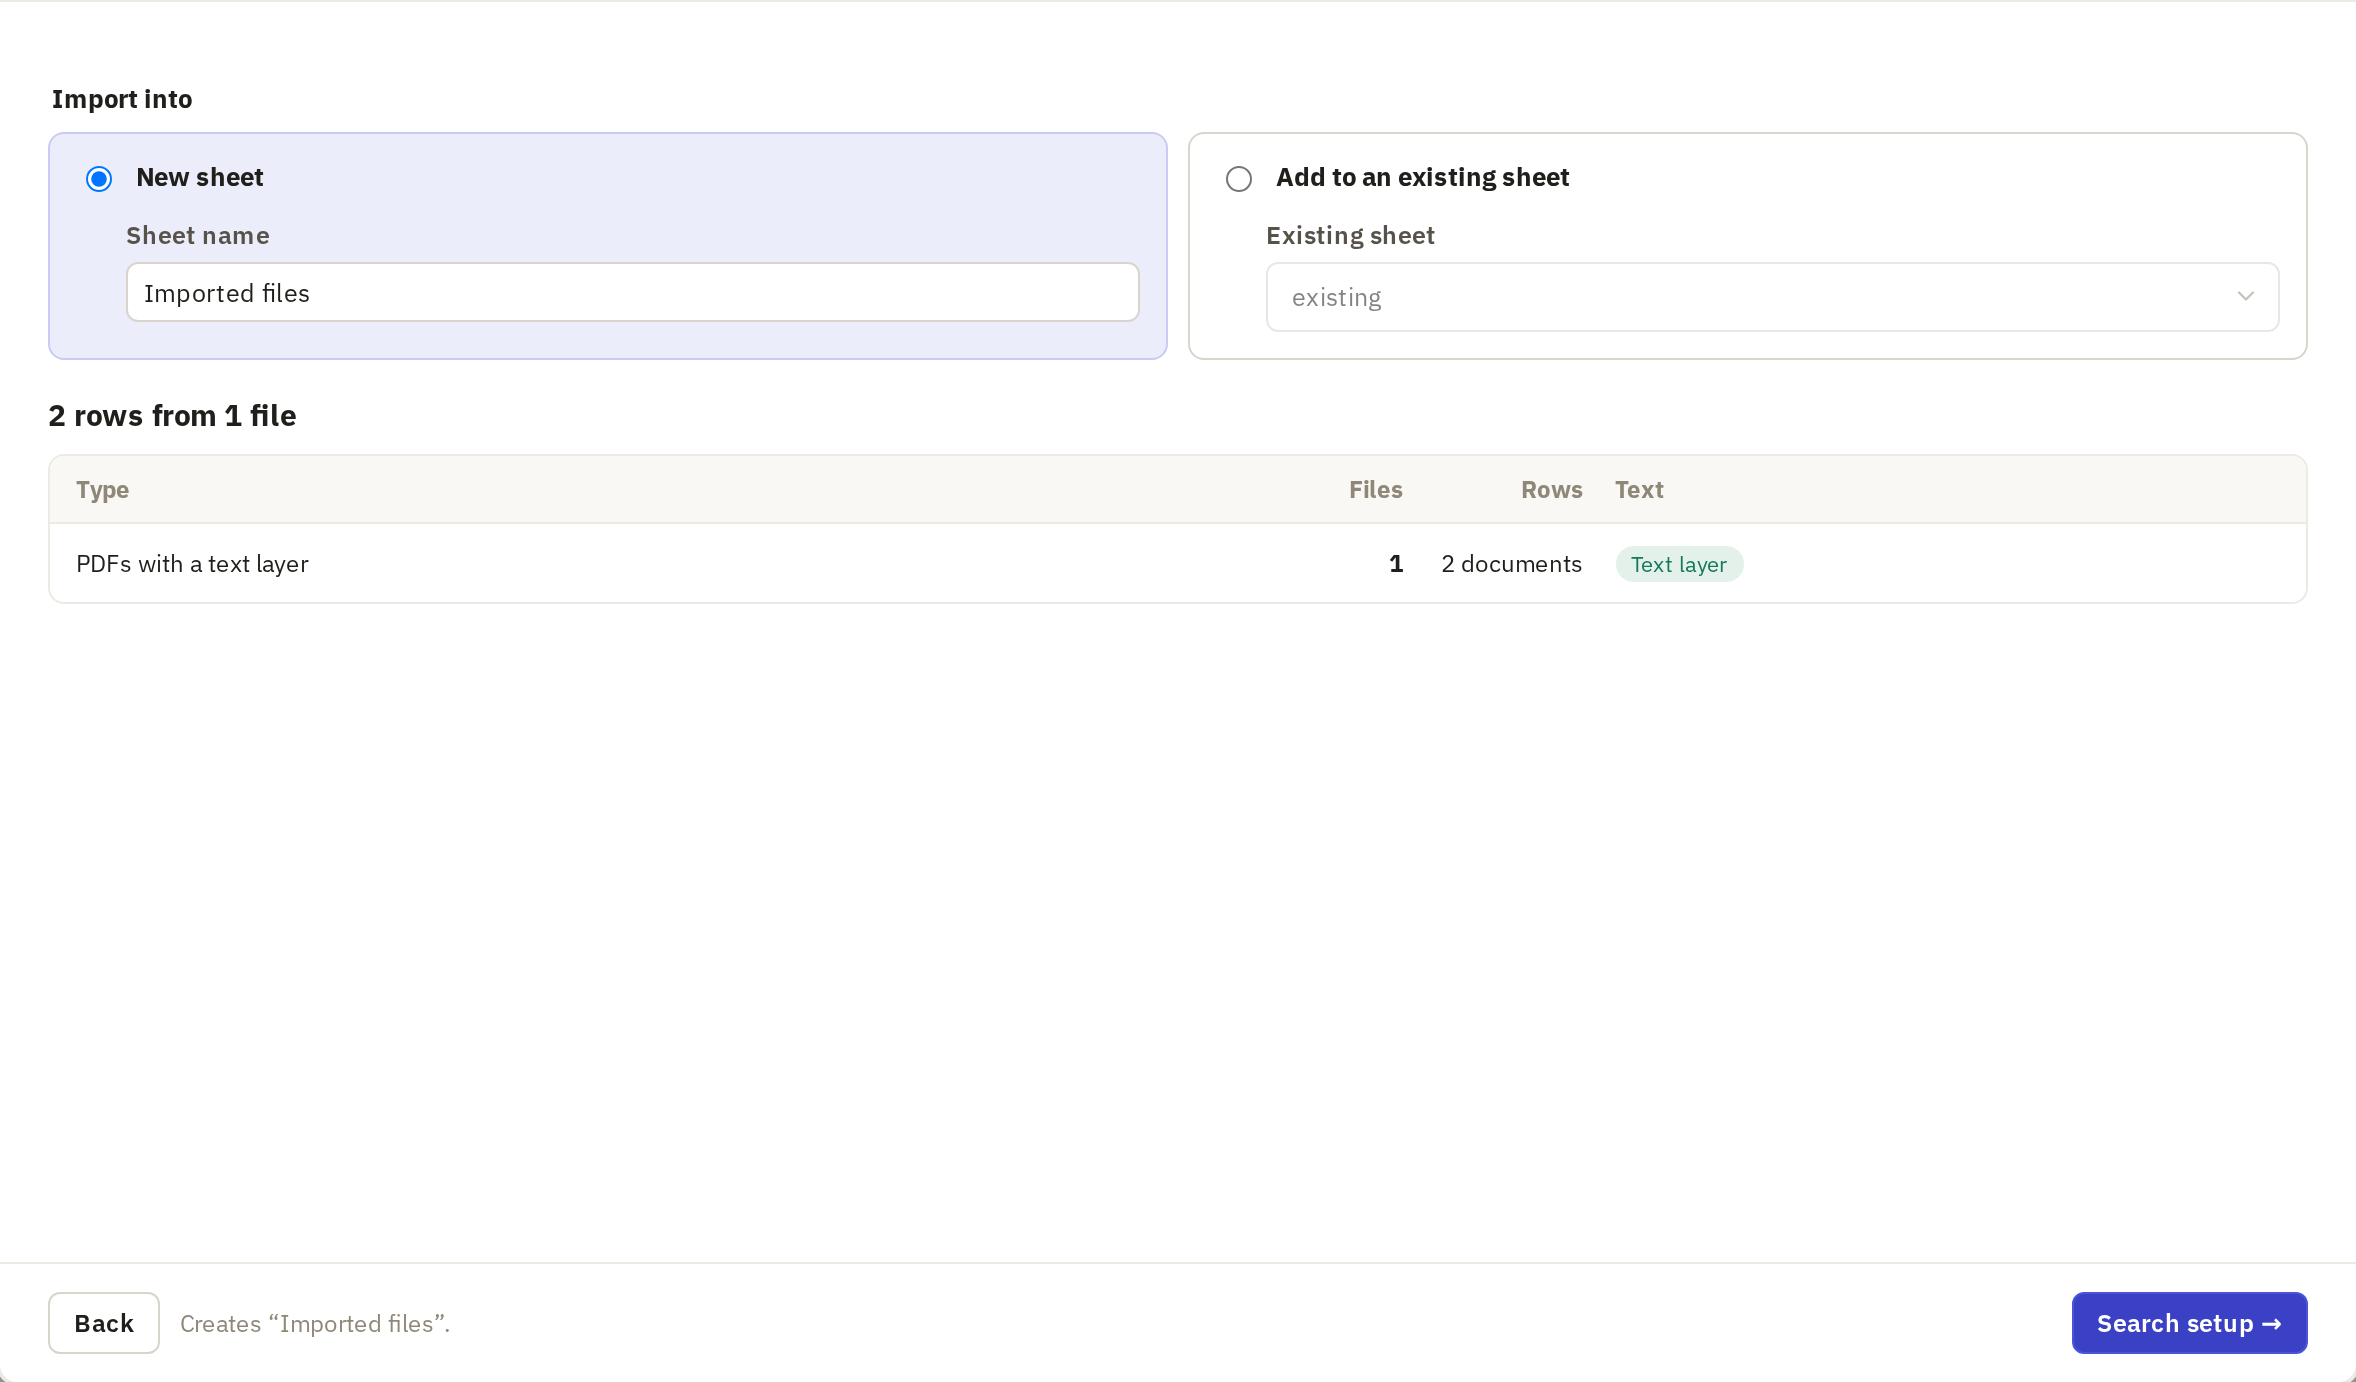
Choose New sheet and type a Sheet name. To add these files to a sheet you already have, choose Add to an existing sheet and pick it. Frisket skips any file with the same name and size as one already in that sheet, so importing the same folder twice doesn't create duplicates.
Click Search setup.
Set up search and import
Keyword search is always included: you'll be able to search the documents for exact words.
Search by meaning also finds passages that use different words for the same idea, such as "fired" when you search for "terminated". It's on by default. It needs a model where Frisket runs. If the model isn't there yet, this step shows its size; tick Download this model when the import starts to get it, or clear Search by meaning if you only need keyword search.
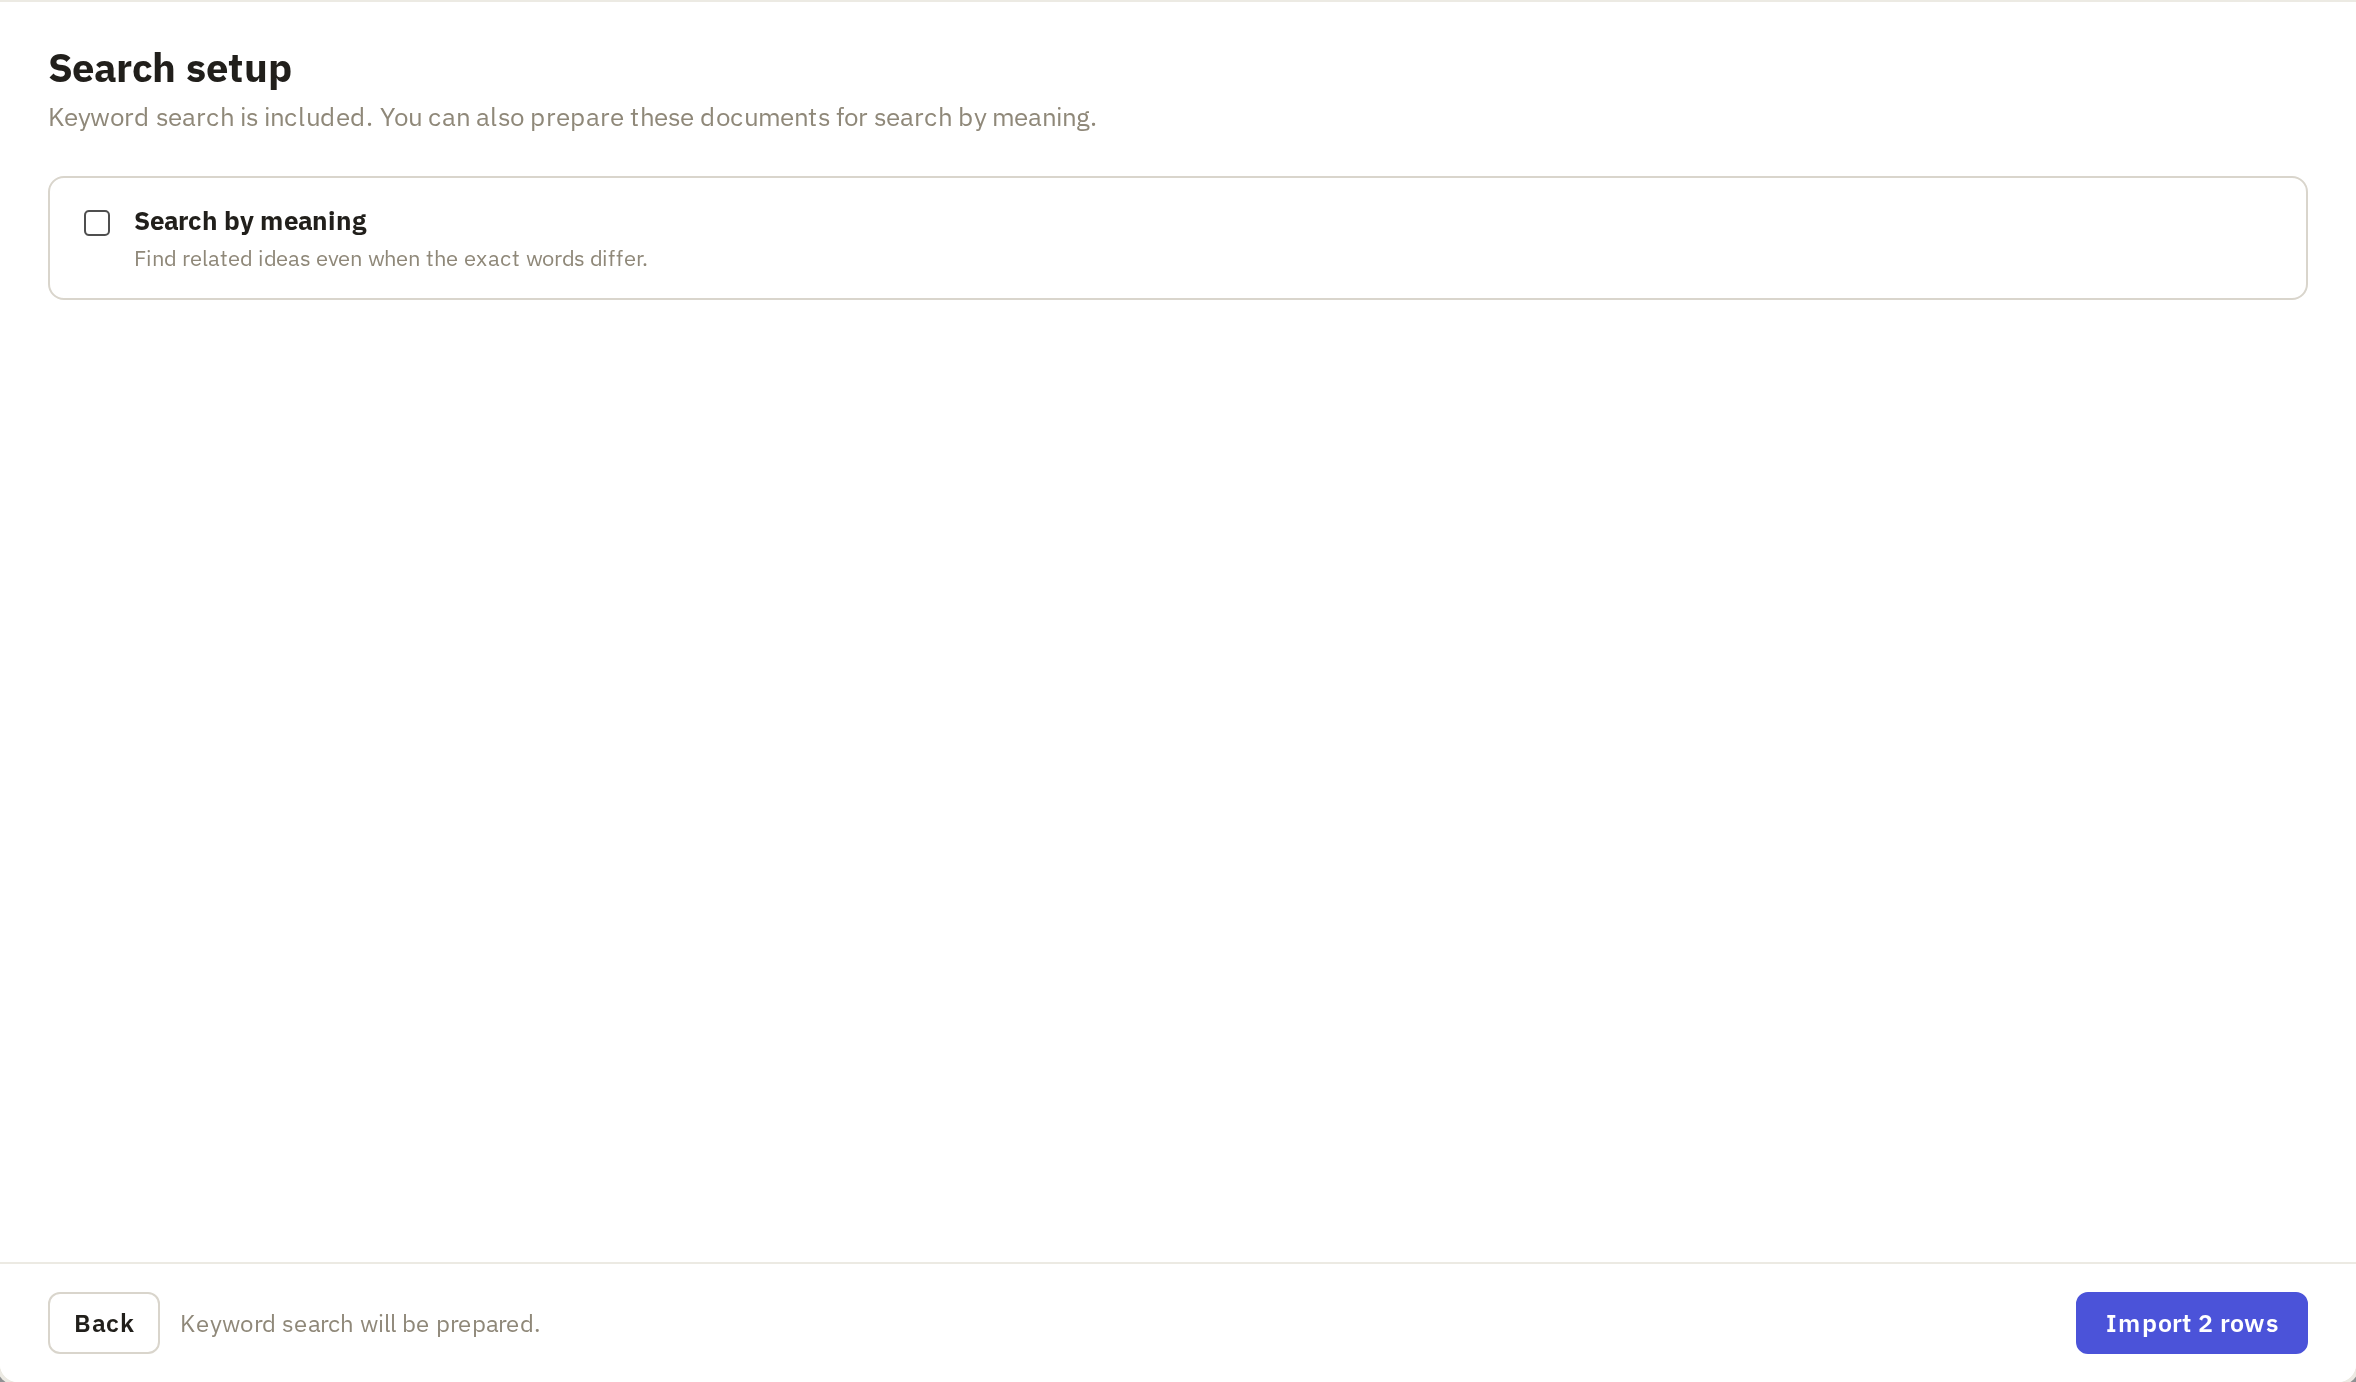
Click Import. The button shows how many files or rows will be added. The new sheet has a row for each file, page or document, depending on what you chose, with the file name, the PDF and its text.